


The navigation or nav file is where pages/hyperlinks are organized for a given site or site section. The navigation file is located in the folder for the site or section and is named _nav.ounav.
Adding/Editing Navigation Links
- Within your Omni CMS site, go to Content > Pages. You can then navigate to the _nav.ounav file that requires revision, or select a subdirectory folder to revise that sub site or site section's navigation.
- Click the file name, _nav.ounav, to open.
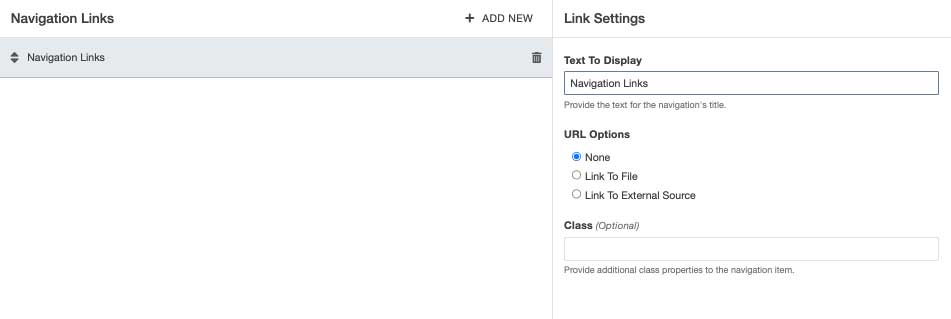
- Click + Add New to add a new link or click one of the current navigation links to edit.
- Type to enter the Text To Display. This will be the text to appear in the navigation.
- In the URL Options field, select one of the three options:
- None: this is not linked (a default option) and is mostly used for testing purposes.
- Link To File: select the webpage/file to be linked by clicking the "Choose a File" button next to this field.
- Link To External Source: this is used for links outside of kennesaw.edu
- To reorganize the order of the navigation, click and drag the Navigation Links on the left.
- Once you are done click the blue Save button.
- If you are ready for the navigation to be live, click the green Publish button.


